

Why These Three Tasks Are a Genuine Starting Point
Most maintenance anxiety comes from not knowing where the line is between what's approachable and what isn't. The three tasks covered here — engine air filter, cabin air filter, and wiper blades — sit firmly on the approachable side. They require no draining of fluids, no lifting the vehicle, and no torque specs. They also happen to be tasks that shops often bill significant labor hours for, despite taking only minutes once you know what you're doing.
For context on the fuller picture of what routine maintenance actually costs, see our article on why maintenance costs catch so many car owners off guard. And if you're trying to figure out which tasks deserve your limited budget first, car maintenance on a budget lays out a practical priority framework.
These aren't the only DIY-friendly jobs out there, but they're the right ones to start with — low risk, clear steps, and immediate payoff in both savings and confidence.
Owner's Manual
Confirms correct part specifications, replacement intervals, and any vehicle-specific instructions for each task.
Replacement Engine Air Filter
Swaps out the clogged filter restricting airflow to your engine — must match your vehicle's year, make, and model.
Replacement Cabin Air Filter
Restores clean airflow through your HVAC system; sized specifically to your vehicle's filter housing.
Replacement Wiper Blades
Restores clear visibility in rain; blade length varies by vehicle and sometimes differs between driver and passenger sides.
Flathead Screwdriver
Used to release clips or tabs on filter housings and wiper blade connectors.
Disposable Gloves
Keeps hands clean when handling dusty filters or greasy engine components.
Before You Start: What to Have Ready
Success with any DIY task depends less on skill than on preparation. The most common mistake first-timers make is buying parts before confirming specifications, then discovering the filter is the wrong size once they're halfway through the job.
What you will need
Once you have the right parts in hand, the steps below walk through each task in order. If at any point something looks unfamiliar or doesn't match what your owner's manual describes, knowing when to hand a job to a mechanic is a skill in itself — and a financially sound one.
Step-by-Step Instructions
Look up your vehicle's part specifications
Before buying anything, open your owner's manual and find the sections on engine air filter, cabin air filter, and wiper blades. Write down the part numbers or size specifications listed. Many auto parts retailers also have in-store or online lookup tools where you enter your year, make, model, and engine size to confirm the correct fit. Getting this right before you start saves a wasted trip.
Replace the engine air filter
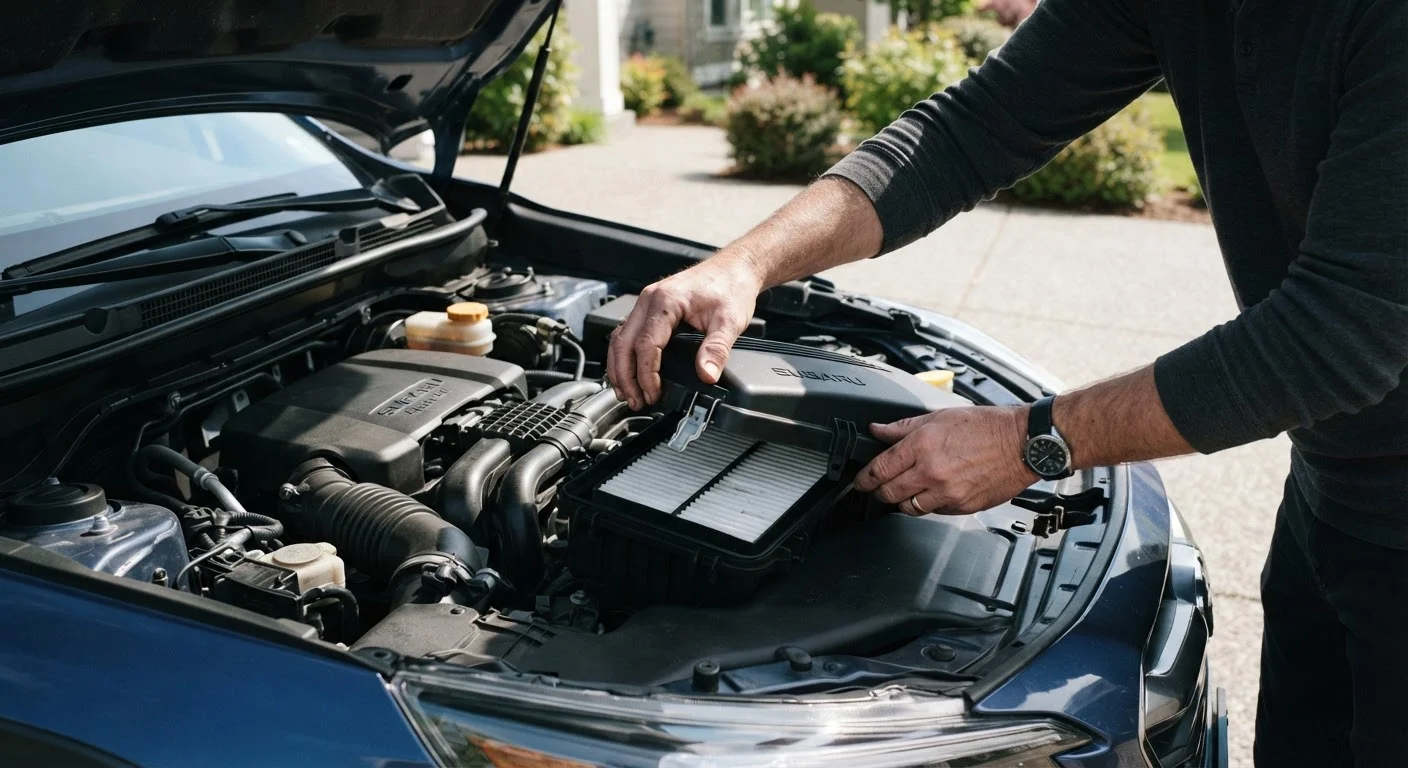
Pop the hood and locate the air filter housing — it's typically a black plastic box near the top of the engine with a large hose attached. Unclip or unscrew the housing cover (usually no tools needed), lift out the old filter, and note which direction it sits. Drop the new filter in the same orientation, replace the cover, and re-secure the clips. The whole job usually takes under 10 minutes.
Replace the cabin air filter
The cabin air filter cleans the air flowing through your heat and A/C vents. On most vehicles it sits behind the glove box or under the dashboard on the passenger side. Your owner's manual will show the exact location. Common access method: open the glove box, press the sides inward to allow it to drop down further, and the filter housing becomes visible. Slide out the old filter, note the airflow direction arrow printed on it, insert the new filter in the same direction, and reassemble.
Replace wiper blades
Lift the wiper arm away from the windshield until it locks in the upright position. Find the release tab where the blade attaches to the arm — pressing it lets the old blade slide off. Attach the new blade by sliding it onto the arm in the same direction until you hear a click. Repeat for both wipers; the driver and passenger sides often use different blade lengths, so confirm each before purchasing.
Test your work before driving
After completing each task, do a quick function check. Start the engine and listen for any unusual sounds near the air filter housing. Run the heat and A/C on full fan speed and check that airflow feels noticeably stronger if the cabin filter was heavily clogged. Turn on your wipers with the windshield damp and confirm both blades clear the glass cleanly without skipping or streaking. Address any issues before taking the car on the road.
Track What You've Done and When
Keep a simple note on your phone — or a sticky note in the glove box — logging each task and the mileage when you completed it. This tells you exactly when each item is due again, prevents double-replacing things that don't need it, and gives a mechanic useful context at your next service visit.
This article is for general informational purposes only and does not constitute professional mechanical or financial advice. Always consult your vehicle's owner's manual and, where in doubt, a qualified mechanic for guidance specific to your vehicle.
The content provided on our blog site traverses numerous categories, offering readers valuable and practical information. Readers can use the editorial team’s research and data to gain more insights into their topics of interest. However, they are requested not to treat the articles as conclusive. The website team cannot be held responsible for differences in data or inaccuracies found across other platforms. Please also note that the site might also miss out on various schemes and offers available that the readers may find more beneficial than the ones we cover.